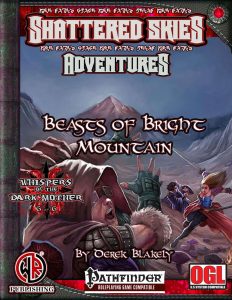
Whispers of the Dark Mother #6: Beasts of Bright Mountain
Whispers of the Dark Mother #6: Beasts of Bright Mountain
The finale for the roller-coaster-ride that is the „Whispers of the Dark Mother“-series clocks in at 35 pages, 1 page front cover, 1 page editorial/ToC, 2 pages of SRD, 1 page back cover, leaving us with 30 pages of content, so let’s take a look!
As always in the series, we get a fully detailed deity-write-up: The Creator, the neutral nature-deity of Celmae, is depicted – 6 domains…and no subdomains? Weird.
Cartography-wise, we get 2 player-friendly encounter-maps, which is pretty nice – though there are no full-page versions, which makes their use a bit annoying. Similar things hold true for the dungeon maps, though it should be noted that we get no player-friendly, key-less versions for these. So yeah, pretty much same old, same old for the comfort-levels of the cartography in the series.
On the plus-side, after the strange filler-module that was #5 (the whole module still makes no sense to me), we thankfully return to the hunt for Corvun Baerg that started in module #4. The Pcs follow Corvun’s trail into the tunnels, through glowing mold caverns…and here, things get real pretty much from the get-go. Cave leech. Black skeletons – the tunnel’s hard, but not close to how bad things will get; exiting into a mist-shrouded, secluded valley, the PCs will be stalked – the mythic Beast of Bright Mountain ( a mythic howler), can be found. This would btw. be as well a place as any to note that, while the statblocks are better than in almost every installment of the series, there are some formatting issues that could have been caught by even a cursory look at the final version: “Combat ReflexesM”…you get the idea. Still, the beast is certainly one of the most amazing foes in the whole series.
Following the path of Corvun, the PCs may well run into half-elven whisper knights – deadly adversaries, before finally entering the mountain temple of the Dark Mother. The dungeon is actually, craftsmanship-wise, pretty much the best in the series – we get summoning traps, varied foes (cultists, a bone golem (!!), blighted fey satyrs, shubian mountain goats – the enemy-diversity is here. It’s actually nice!! That being said, the formatting is sloppy: The text e.g. refers to A1 and 4b as regions – the map only sports a room number 4. The shubian goat mentioned has had its stats obviously cut-copy-pasted without properly formatting it. Its stats are also incorrect. The formatting, at least, is something you can see with even a cursory glance.
Heck, on the other side, custom NPC-stats like a tiefling alchemist (larval progenitor), are interesting- Corvun, btw., has turned into a delightfully disfigured dark satyr cleric with a glorious artwork – though, once again, there are some hiccups in these: Corvun’s AC, for example, is off be 1. More jarring would be the fact that the layout/formatting botched using superscript letters in every single instance. *sigh* That being said: Cave druids with yeth hounds! An intelligent, advanced fiendish chimera! An Apocalpyse shadow rat swarm! The enemies are more creative than all of the foes in the series so far combined; the module is significantly deadlier than the cake-walky sections in previous modules in the series – and all without resorting to dickish means. The challenge is brutal, but fair.
And then, there’d be the final encounter: Hexos Vell, the master of the cult, would be a beast-bonded witch/devotee of evil; he is supported by a mehrim cleric creature of Gof-DuoPog and a fiendish thousand young bloodrager as well as half-fiend variant clerics. We get a buff-suite here; combat tactics and some rather cool synergy here – as it should be, this is the hardest encounter in the whole series and can become really brutal. That being said, I thoroughly liked the combination – and, as a whole, the enemy selection within is diverse and the boss encounter is by far the most interesting one in the series regarding the challenges faced. I really wished that the adversaries featured herein would have been foreshadowed or distributed better among the respective individual modules of the AP.
We close the pdf with some ideas for further adventures.
Conclusion:
Editing and formatting are not good, okay at best: There are some serious formal hiccups that should have been caught by even a cursory inspection. Layout adheres to a really nice two-column full-color standard and the pdf comes with some amazing original artworks, some reused artworks and some stock pieces – all in full-color. Particularly the new artworks are really nice. The pdf comes with bookmarks. I already commented on the shortcomings, convenience-wise, of the cartography – basically the same symptoms as in the whole series. Similarly, the pdf does not allow for the highlighting of texts or copying from it. Annoying.
Derek Blakely, Jarrett Sigler, Robert Gresham and Ewan Cummins deliver, THANKFULLY, at least a good finale for the series; after the horrible module #5, I wasn’t too thrilled for this one, but thankfully, both story and leitmotifs are back on track in this one. It once again feels like a module that belongs into this series.
The NPCs and combats faced herein are, by far, the most well-designed and interesting in the series – I wished that these aspects had been featured sooner in the series – it would have made the series much better. Difficulty-level-wise, this is by far the hardest module in the series, but for the right reasons: The challenges posed are potent and intriguing. While the quality of the module is hamstrung by the formal issues, I consider this to be one of the highlights in the series. I just wished that the dungeon per se would be more interesting: The temple itself is a collection of tunnels – claustrophobic and deadly, yes, but compared to #4’s unique, vertical shrine and amazing final encounter area, the pdf doesn’t sport an environment that evocative. That being said, this module is worth checking out.
The best way to utilize this whole series may be to run #1 (if you need a starting point), insert some modules of your own, and then mash #4 and #6 together: Stretch #4’s dungeon by inserting the NPCs and defenses in this module, add the potent cult leaders into the final encounter atop the maw – the scenario will be really cool and, in fact, such a combo would have had excellent chances at 5 stars + seal. In the end, the series, as a whole, feels unfocused in the story told – the series begins with aspirations of horror and then focuses suddenly more on heroic fantasy with a thin dark fantasy coating, to return to dark fantasy and serious challenges in this final module.
That being said, I consider this module to be one of the two highlights of the whole series; this may well be the module that had the best “skeleton” – what can be seen here, has all the potential of becoming glorious with a little bit of refinement, proper player maps and a slightly cooler dressing/presentation. The module may not be perfect, but it has some potential and can make for an interesting challenge. Hence, my final verdict will clock in at 3.5 stars, rounded up for the purpose of this platform.
You can get this module here on OBS!
Endzeitgeist out.

